|
Let the giveaway Soiree continue with a FREE PHOTOSHOOT!!! YAYYYY!!! I am super stoked to be collaborating with an awesome creative team to make this giveaway extra SPECIAL!!! Blaire from Sparkles and Vintage is going to Style this photoshoot! She styled an adorable "UP" themed Engagement photoshoot with another photographer and I died when I saw it! Its soooo doggone CUTE!!!! So we are looking for a super cute theme to style and photograph! But wait there's more!!! You will also be getting your hair and makeup up done by the fabulous Claudia Davatolhagh! We worked together on the shoot below and she rocked it out! How to win... 3 MANDATORY ENTRIES:
------------------------------- 1 > INSTAGRAM ENTRY: Follow @janelle_marina, @sparklesandvintage, and @lidored on Instagram If you already follow us on Instagram, your one step ahead! REPOST the Giveaway photo (above) on your instagram, write "Check out this FREE photoshoot Giveaway!" and INCLUDE the link www.janellemarinablog.com and #JanelleMarinaGiveaway 2 > FACEBOOK ENTRY: Like @janellemarinapage and @sparklesandvintage on facebook http://www.facebook.com/janellemarinapage http://www.facebook.com/sparklesandvintage If you already follow us on Facebook, your one step ahead! SHARE the Giveaway post (from my facebook page) on your timeline and write "Check out this FREE photoshoot Giveaway!". 3> BLOG ENTRY: After you've done the above entries LEAVE A COMMENT BELOW to let us know that you have completed ALL the mandatory entries and include your instagram, facebook usernames, and email address. Don't forget to include what type of photoshoot you want to win and your theme idea! >>>>>> NEED TO KNOW: - The photoshoot will take place on a Sunday - Photoshoot must take place within 50 miles from 91765. - Sparkles and Vintage will style the shoot with inventory she already has online (with the exception of the sofas), but you will be responsible for your own attire. Blaire can help with some suggestions for your outfits. - Themes can include color schemes, movies, books, whatever your heart desires! (get inspired by what items Blaire has on her site! - The winner will receive an online gallery with 25-30 images of their shoot -freedom to download, share, & order prints. - Offer expires July 1, 2014 - must use session credit by that date The creative team and I will review all comments below and select ONE lucky winner! You have until midnight on Tuesday to enter this giveaway and the winner will be announced Wednesday March 5th. You may not want a photoshoot but your friends might be interested so be sure to spread the word! So go get your entries on!!!! Good luck to everyone!!! :)
17 Comments
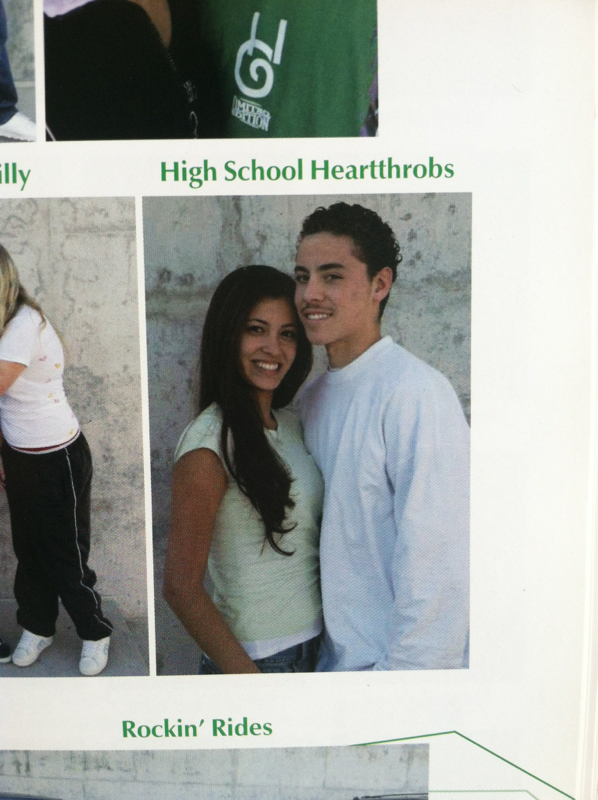
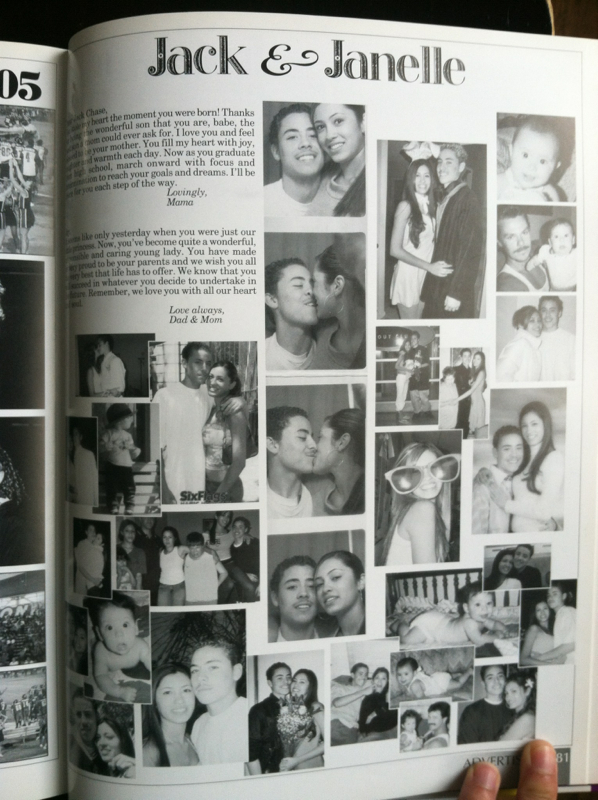
It was one of those days that you look at yourself in the mirror and think "This was not my day!" That seems to happen a lot in high school! You have a lot of those awkward moments! I felt funky and i looked even funkier! I was wearing this awful hat that I had thought was cool when I left the house that morning but hours later I realized it wasn't the business! My makeup had smeared from gym class and I looked down at this huge sticker that was covering a cheese stain (from my healthy hot cheetos and cheese lunch) that had spilled on my shirt! It was definitely an UGHHHH kind of day! I was sure glad it was over and as I started up my truck in the school parking lot -I glanced to my left and there he was... The cutie that I met last week in the gym! We got introduced by our mutual friend and he had seemed so shy! This was only the third time I saw him in the 2 years of going to the same high school. I guess we had different lunches and our classes were on totally different sides of the school. He approached the passenger side of my truck with a sweet smile signaling me to roll down my window. Really!?! Of all days and outfits this is the day we're going to talk! I nervously let him in. It turns out this shy guy was not so shy at all! Well not to me at least! We totally hit it off! It's so true that opposites attract because we couldn't be more different! And it all began in that little truck of mine... We shared our first convo, our first kisses, our "I love you's", our first car accidents (yes Jack crashed into the back of my truck one day in our school parking lot -luckily there wasn't much damage, but it was an awkward conversation to have with my parents.) This little pickup truck became our family wagon, so it only made sense to include it in our 10 year anniversary photoshoot that we did last week with the awesome Alisha Marie Photography! I cant believe it's been 10 whopping years since those two awkward kids fell in love and are now married with two gorgeous boys! And we cant forget the new pup! Lol! I know once you get married your supposed to stop counting your first anniversary but I think it's a huge deal in this day n age to make it to ten years! I'm still in love with this kid more today than yesterday! He's still the ONE I love to be around, to annoy, snuggle up to, vent to, scratch his back, rub his feet, sing with, dance with, cry to, & laugh with! We are perfectly IMPERFECT and that's the way I like it! Im soooo enjoying living my life with him! Cheers boo boo to an awesome 10 years and here here to a GAGILLION more! Special thanks to one of my favorite photographers Alisha owner of Alisha Marie Photography!!! We had such an awesome time with her and I couldn't be happier with our sneak peak of our shoot!
Since Ive launched my new website a few people have asked me who designed my website? I am so proud to say that it is a Sitehouse Design from the new Spring 2014 LUXE COLLECTION designed by the talented Meg Long. I actually fell in love with two designs so I was able to combine them to my liking. That's whats so awesome about Sitehouse is they are COMPLETELY CUSTOMIZABLE!!! Sitehouse is an awesome company, created by the fabulous Promise Tangeman, that sells uniquely designed websites with the abilities to customize it to fit your style & business. Its pretty easy to use and they have a LIVE chat group of Showit Studs to help you along the way! I am soooo stoked that Sitehouse is giving away ONE FREE DESIGN NEED TO KNOW... > the winner can choose any site they want from any collection -even the new Spring Luxe collection! Woo hoo! > Sitehouse designs are only compatible with Show it software and they are totally customizable! Checkout this video of how easy it is to use! http://customizationdemo.sitehousedesigns.com/#/demo2/ > Promise (the creator of Sitehouse) hosts Sitehouse workshops where you build & launch your new website in only 2 days!!! If you win you could apply a $350 credit towards the March GO+LIVE workshop (the design is included in the workshop fee). They only have a coupe spots left! The link to the workshop information is here -->http://www.sitehousedesigns.com/#/workshop/ and the video about the workshop is here -->http://www.sitehousedesigns.com/#/june2013/ > CANNOT BE REDEEMED IN CASH! How to win...3 MANDATORY ENTRIES: ------------------------------- 1 > INSTAGRAM ENTRY: Follow @janelle_marina and @sitehousedesigns on Instagram If you already follow us on Instagram, your one step ahead! REPOST the Giveaway photo on your instagram and INCLUDE the link www.janellemarinablog.com and #JanelleMarinaGiveaway 2 > FACEBOOK ENTRY: Like @janellemarinapage and @sitehouse on facebook http://www.facebook.com/janellemarinapage http://www.facebook.com/sitehouse If you already follow us on Facebook, your one step ahead! SHARE the Giveaway LINK on your timeline. 3> BLOG ENTRY: After this is all done LEAVE A COMMENT BELOW to let us know that you have completed ALL the mandatory entries and include your instagram & facebook usernames. ONE lucky winner will be randomly selected from the COMMENTS below and announced Wednesday February 26th. So go get your entries on!!!! Good luck :) CONGRATS Alissa Bird for winning the Sitehouse Design! Please email me to claim your prize! [email protected] HUGE Thanks to everyone for joining! xox
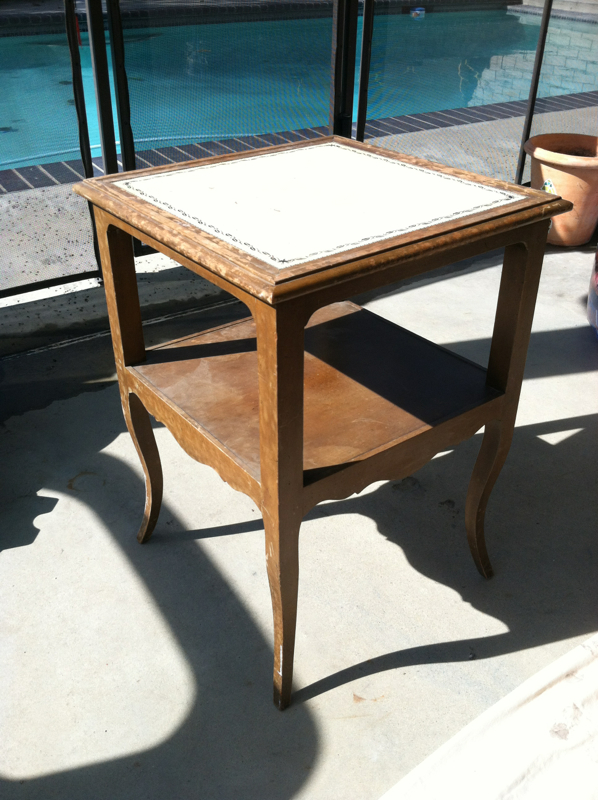
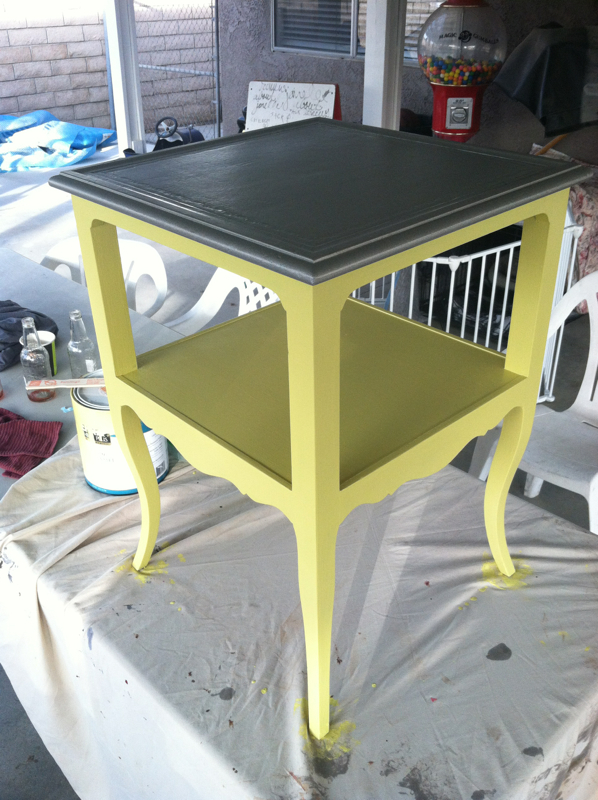
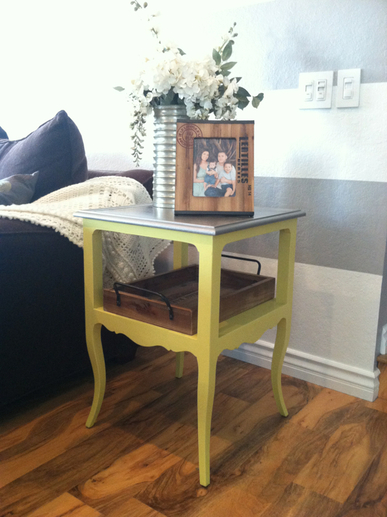
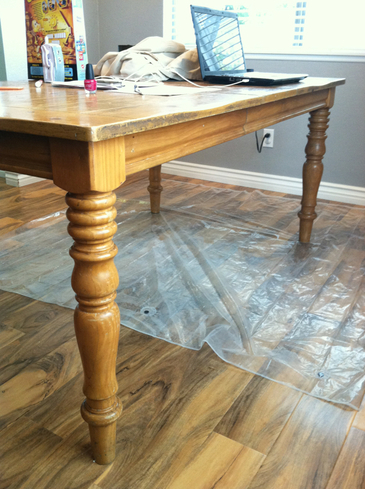
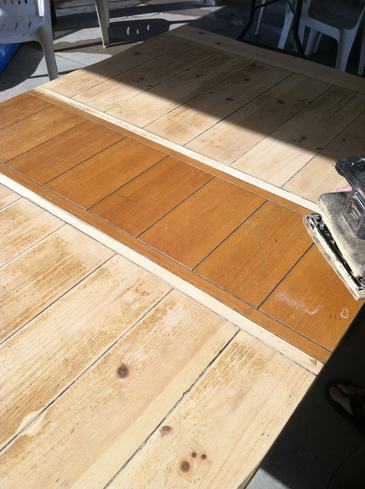
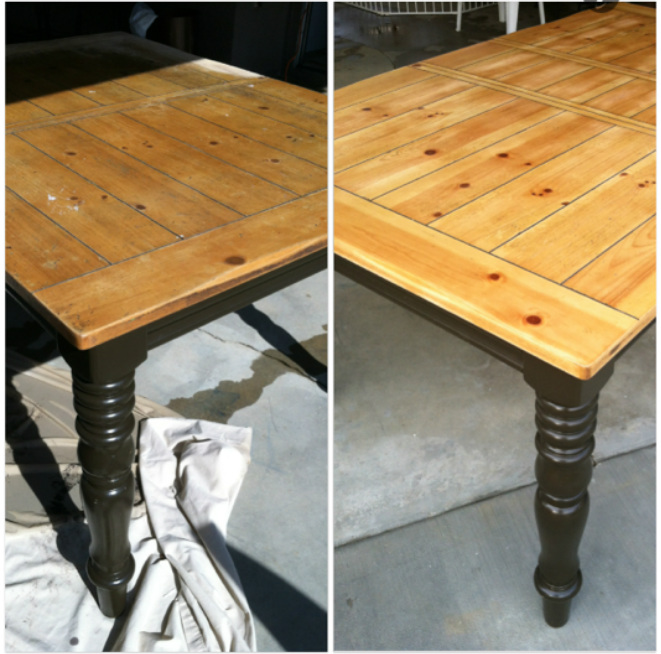
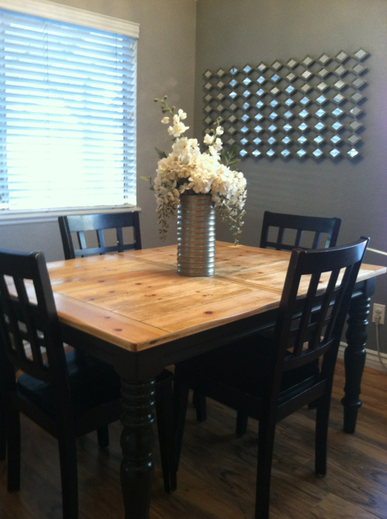
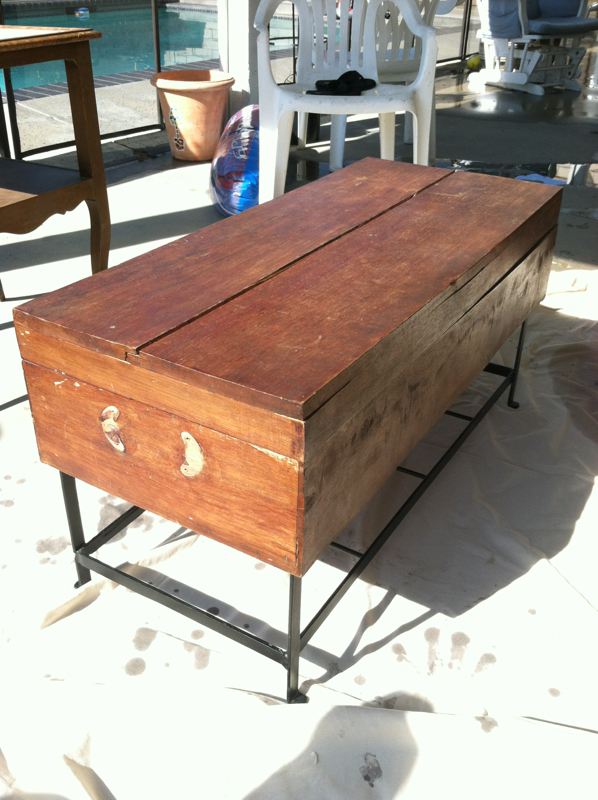
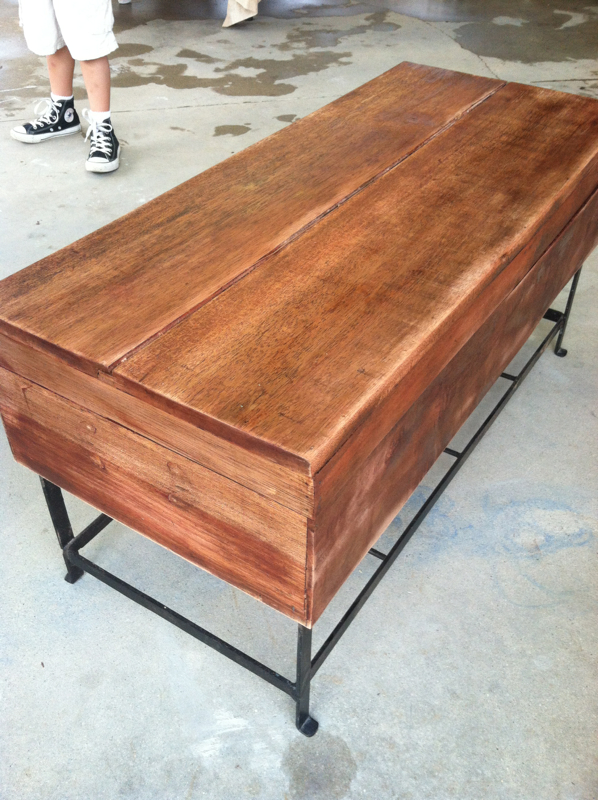
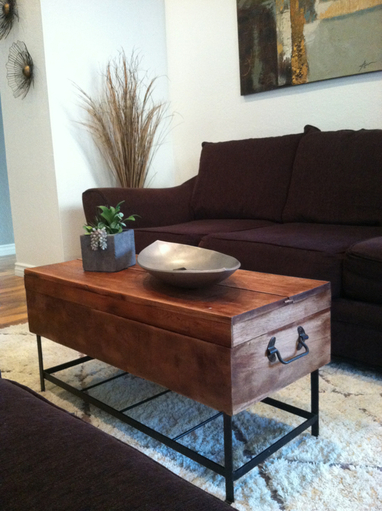
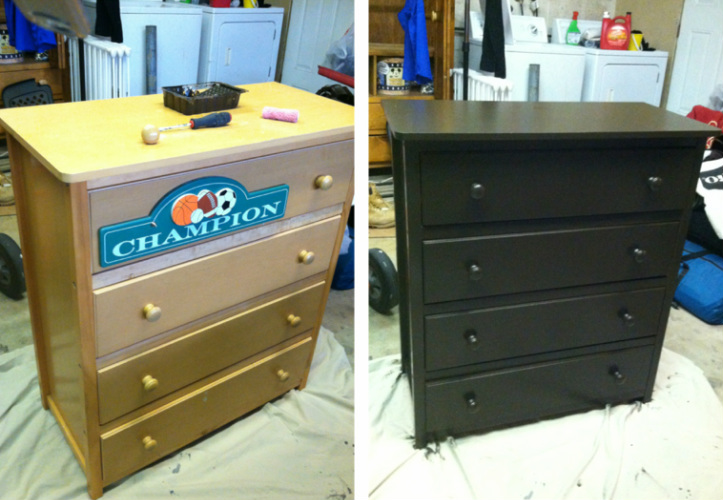
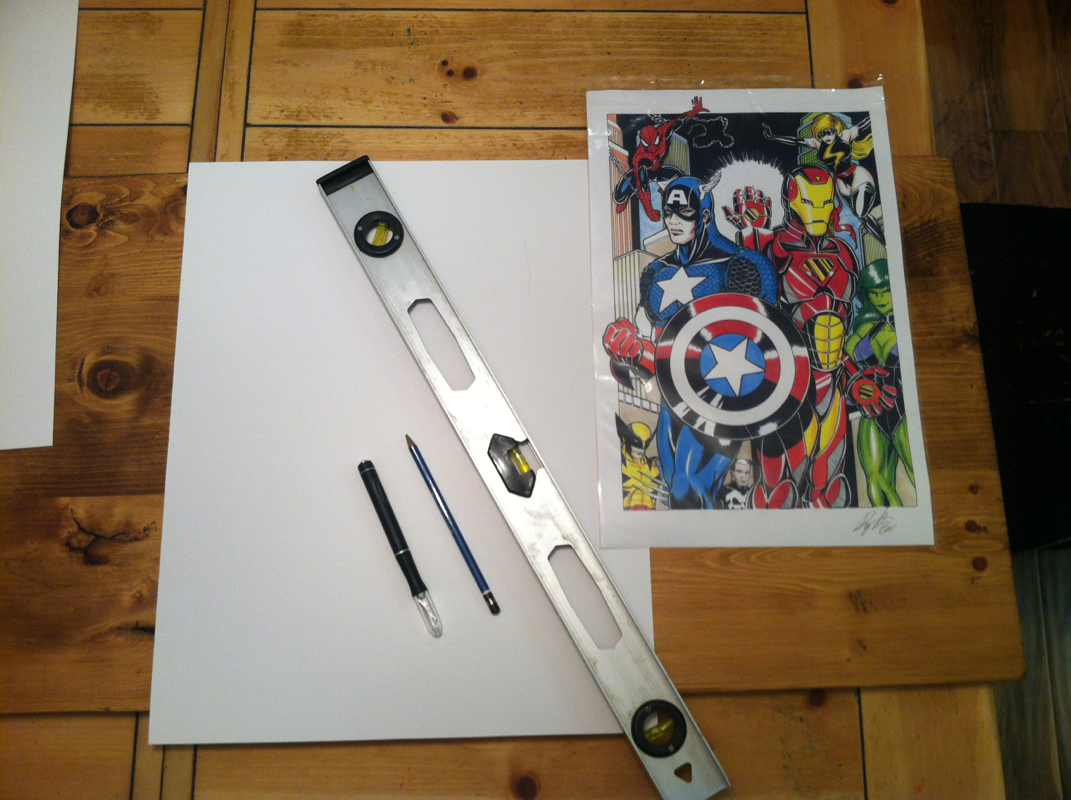
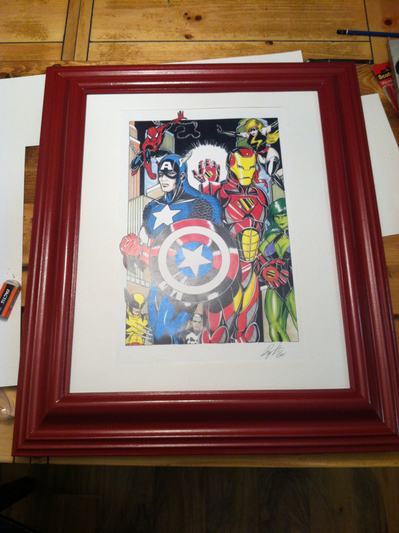
Its kinda funny to hear people say I'm creative or artistic. I never thought I was either! I wasn't born with a crazy skill -everything I do I have to work hard at! I didn't have a natural eye for art -I feel like I had to train my eyes! I see art or creative ideas and jumble all the things I like about them together to make it my own. Its not a special skill -anyone can do it! The secret is actually taking the time and patience to do it. Growing up the middle child out of 5 I had my fair share of hand me downs -they werent always in the best condition so I had to make them work! Whether it was clothes, toys, furniture etc. I have always been one to collect junk in hopes of restoring. I hate throwing things away. Notice I said "hoping" to restore -well my problem is that sometimes I take on too many projects that I forget about them and either never start or finish them. It took me a whole year to paint this little table that was shoved in a corner collecting dust. My husband tried to throw it out twice which ended in me promising that I would paint it this weekend! Well a year later "this weekend" finally came. I tried to explain to him what my plans were for this cute little gem and he couldnt see beyond old junk that was taking up space in the garage. He has no vision -everything to him is black or white! On the other hand I am mostly gray! So we balance each other out, while sometimes driving each other crazy! Well MOSTLY driving each other crazy -in a good way though :) I used to get my feelings hurt when he didnt understand my vision or just not excited about it as much as I was -now I know to just do it and cross my fingers that he loves it! It would drive most people crazy that I hang frames in my house that still have the stock photos of strangers in them to remind myself to print photos -Im lucky that he deals with the madness!. Will they ever get filled... eventually ;) that's another project on my to do list! So onto the few projects that we finally completed. When I say "we" I mean my father n law and myself. We share the same love for restoring old gems and making them modern. I'm not gonna pretend like I'm this pro restoration lady -far from it! I'm just a chick trying to save a buck by turning the old stuff that my father n law finds and make it work in my home. I don't have the money to get all new furniture but I can afford a bucket of paint and inspiration on pinterest! Im chose to decorate my in an electic industrial style -basically anything goes! Unfortunately I took all my photos with my phone so they are pretty crappy AND I didn't take many photos during the transformation process :( but ill try to explain what I did in between. It was nothing too special -just needed a sander, paint, and sealer. Most of the Paint was leftover Satin finish paint from other rooms in the house :) Im pretty sure that's a big no no in the professional DIY community! OOPS! This table was one of my father n laws finds from one of his many Salvation Army trips. It had a laminate top that I spray painted with a Nickel Spray paint from home depot to give it a metal look. Then I painted the legs a yellow/greenish color that I had originally painted in my kitchen but immediately painted over it because it was causing extreme headaches if we looked at it too long. It was one of those things that I just had to try out. Luckily its just paint and I painted right over it the next day! But I think that it looks great on smaller items like this table! Its a great pop of color for the house! After bringing it inside I had no idea where to put it or what the heck to put on it! Since this photo it has been moved twice and now has a lamp on it! I think I found the perfect spot and once my living room is complete I'll be posting more photos :) This dining table was soooo old! It was a hand me down that collected crayon, nail polish, pen markings among other things. It was time to give it a face lift. And it totally blended in with the color of my floor which made the room look so BLAH! I couldn't throw a rug underneath to separate them -not when you have a baby that thinks its funny to toss his food any chance he gets! So I painted the legs an Espresso Brown from Home Depot that we had leftover form painting the cabinets in the bathroom (that'll be another blog post too). I didn't have to sand the table legs because 1) I was too lazy to get around all those curves and 2) they didn't seem to have too high of a gloss seal on them. I was taking a chance but hey it all worked out! My father in law sanded the top grime off the table for me because that sand was going nutty! I swear it felt like I was jack hammering the table! Out of control! So I really didn't want to add a sealer on the table because I loved the raw look it had but realistically with children I needed to protect the wood from all of our future spills :( The end result wasn't a huge difference -it just looked like a cleaner table hah! I would have loved to damage the wood so it looked weathered and more rustic but I have no clue how and when I googled it, it looked like tons of work that I didn't want to do at this time -so maybe this table is to be continued... :) After the makeover I think it definitely looks better in our small dining area and doesn't look so BLAH anymore :) But now Im kinda wishing that I had painted the bottom of the table that yellow/greenish color, I kinda think it would've looked cool! Or maybe Im getting a little too paint happy again! OH! I ordered an awesome chandelier from West Elm that's on back order until April but I sooooo cant wait until it comes! Ill def be posting more photos once its installed! Its gonna look AWESOOOOME!!! :) Moving on the this little chest that I used for a coffee table. It was a hand me down as well and I just wanted to sand it up a bit to give it a rustic look. My husband cant see the difference but I totally do! I love all the grain that came out of it! Do you see it!?! I still need to get some throw pillows on my giant couches! I attempted to make my own but that was an epic FAIL! :( womp! womp! By the way that's my new rug that I got for before Christmas from RugsUSA (amazing deals) that is quickly dying from my children and all the dirty feet that walk on it! :( Sooooo sad! I fell so in love with it -now realizing how ridiculous I was to buy a light colored rug when I have small children in the house. Thank God it was 70% off (black Friday sale). But its still so sad to see it weathering away! Im seriously thinking about getting it professionally washed and rolling it up and storing it until my boys pass their messy stage :( Moving on... here is a little dresser that was brought from the father n law -I believe from Salvation Army too. Its laminate wood and I was able to paint it with leftover Espresso paint from the dining table. I believe its Semi gloss because it was originally bought for the bathroom cabinets. I didn't sand this one I applied 3 coats of paint. it looks great in my sons room. If I could do it again I would've probably used flat or satin finish paint. It seems that the semi gloss peels easily. (don't mind the mess in the garage) And the final project for the night was a frame that I had painted for my sons room. It was a hand me down given to my mom -originally a mirror but broke in her trunk. She was going to throw it away but I had been needing a frame for this awesome drawing that my brother had given my son on his 3rd birthday, so it worked out perfect. I bought a can of red spray paint from Home Depot and painted the frame -unfortunately I'm a big nerd and I forgot to take a before photo of the frame :( It was a tan colored frame with speckles of dark brown. The frame was a lot bigger than the drawing so I contemplated taking it to Michaels to get it professionally matted or to try it the cheap way and cut my own matte. I chose to try it first and if I messed up I could always take it to get professionally done! I was so surprised that I actually pulled it off! I am a matting phenom! I am so excited to add mattes to every frame in the house now! All I did was get a exacto knife from target and some white poster paper. I wanted the matte side face up so I traced the drawing on the glossy side of the paper. With my metal ruler (level) I measured 1/2 an inch inward on each side and then traced an inner window. Then I used my knife to cut the window out and taped my drawing to the poster paper. It was a lot easier than it sounds. And VOILA!!! It looks pretty darn good if I say so myself :) I cant wait to hang it up in Jacks super hero comic book room!
|
I'M JANELLE MARINA
Wife, Mama Shark, + Photographer. Most days, you'll find me in mismatched socks and a top knot, working behind my computer with a smile on my face, listening to Zac Brown Band and R&B --or, dancing in the kitchen with my 3 littles and hunka husband, seeing who could come up with the coolest dance moves. I'm a wedding photographer, West Elm lover, aspiring advocate for our buddies with special needs, and a Certified Dreamer since 1986. We live in a cozy city in Southern California and are always up for a good adventure. I enjoy telling stories with my camera, grubbing on spicy food, and solving the latest Dateline case.
All
December 2019
|


